Are you ready to take your creativity to reach heights?
“Learn the rules like a pro, so you can break them like an artist”. Turn your wildest ideas into reality.
Trainers from one of the top Graphic design institute in Delhi brings you the fundamentals of Adobe illustrator tutorial to help you explore this wonderful graphic suite software,
Thinking of graphic desiging as a career, this tutorial will help you to decide by enabling to explore the basics.?
This tutorial is definitely for beginners, there is no need to have any previous knowledge in adobe illustrator, design, drawing or illustration.
Okay, we’re going to start right at the beginning and work our way through step by step. Learning the tips and techniques are necessary to make everything happens. We will explore lines and brushes. You will master how to use and manipulate types. We will work through how to create your own custom logos and icons and see the sneaky secrets that illustrator has to discover and use beautiful colors and gradients.
With that being said, let’s just get going.
First and foremost: What is adobe illustrator?
Adobe illustrator is software that is a part of the adobe creative cloud committee and it is used to draw the vector graphics. These vector graphics will be applied in a variety of formats like Icons, logos posters banners and many others. Despite the name, it primary used for graphic design. Here I am asking you for the vectors too…!
Well, in design, vector is an image that can be scaled to infinity without losing quality. It’s the opposite of a bitmap image, like a photo, which is made out of pixels and has a set resolution. But don’t worry, you can still use bitmap image inside illustrator, it’s just not what it’s best at.
Setting up our document:
- When you first open illustrator, you’ll be greeted with home screen.
- There are a few presets to choose from, a lot of recently opened files, and what is important: The new file button.
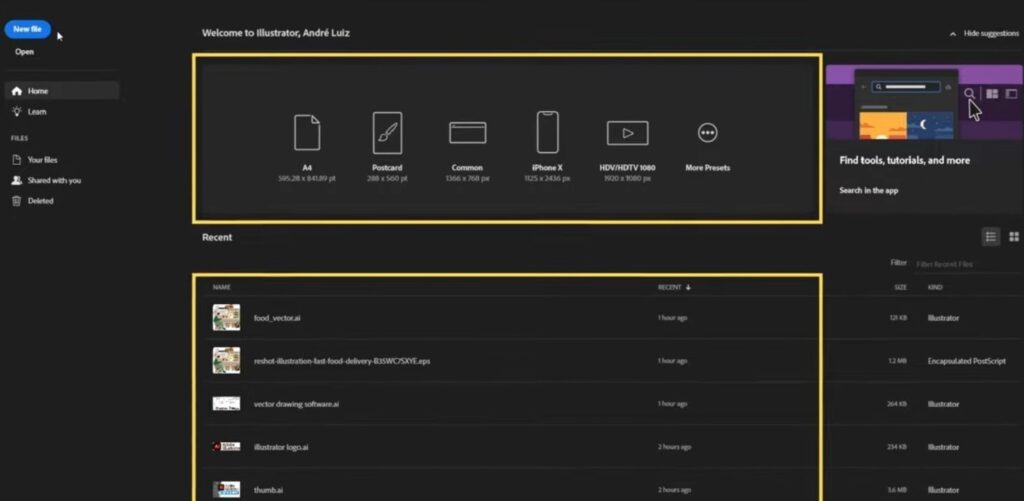
- Upon clicking it, a menu will pop up with some settings. You can customize your new file with size, measurement unit, how many art boards you want and some advanced options like color mode.

Quick tip: use RGB for anything that is digital and CMYK for anything that will be printed.
- 4) After setting everything up and clicking the create button, you will reach the most important part of the program, which is the workspace.
- Everything you see in the screen right now can be customized and moved around, every tool, menu and panel.
There are also different workspace presets for different workflows, which you can access on the top right corner of the illustrator.
- For now, let’s select the essential classic preset.
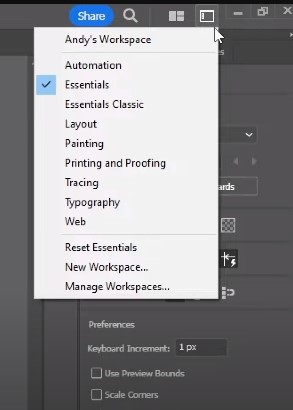
We think it’s going to be good for starters.
The work space in illustrator can be separated in different parts, and knowing them will help you understand the software.
- On the very top we have the header.
- Here you’ll find the entire menu. A lot of things in illustrator can be done in several ways, but more often than not, you can find what you are looking for in the menu.
- Down below we have the control bar which is going to be the most helpful element in the workspace.
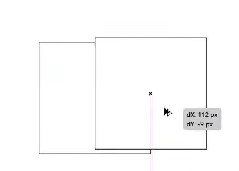
- Finally in the center of the all the panels and bars, we have the art board.
This is where you can add elements like geometric shapes, text and images. More than one art board can be created, for a multi-paged file, like a presentation.
Okay that’s a lot of stuff already. Don’t worry, give it sometime and you will get used to it.
Basic selection techniques in illustrator
Now before we actually start creating some things let’s get some of the basics out of the way.
- For this you can also use V as a shortcut key.
For direct selection is there is a shortcut key that is A.

- If I have objects on my art board or canvas, I can select them all by having a left click on them.

Now we have the workspace figured out. So, the first two tools in our tool panel over here to the left are going to be the selection tool.

- There’s a little boundary box appearing outside of it and also have some anchor points on the boundary which is going to select the entire shape.
- When we hover over the little handles on the boundary you can squash or stretch your shapes around.

We can also duplicate things here.
- If I have the Direct selection tool it will select the whole shape over here but you will notice that where did that boundary box go. Instead, each of the anchor point is highlighted.

Here the direct part of direct selection tool comes in.
- You can click on any of the anchor point with the direct selection tool and modify the location of anchor point which in turn going to change the shop of the object completely.

Creating shapes in Adobe Illustrator
Well, illustrator offers allot of awesome shape tools.
In the tool panel, if we hold on this rectangle tool, we can actually select any one of these tools. For instance: If I just click and drag with the rectangle tool, I can create a shape weather it is square or any other sort of rectangular shape. When I let go off the click, it is going to be filled with some color stroke.
Now there is couple of modifier keys that we can use while creating our shapes.
If you want to create from the center out a perfect square:
- Hold option and shift key and drag to create a perfect square from the center out.
- If you want to make a rectangle or all different types of shapes, just hold the option and ALT key and drag on the art board.
Polygon tool
With this tool we can create different types of polygons.
Notice how we just started with the triangle over here.
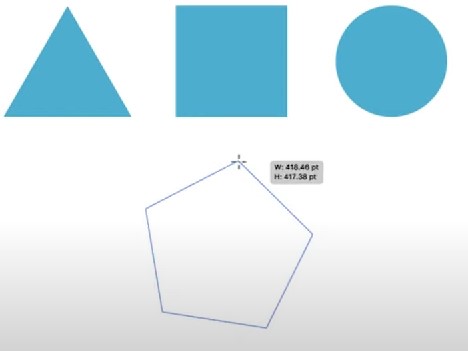
To add more sides to the shape:
- Press Up and down on the arrow keys to add sides to our shape.
- Press down to decrease the number of sides to the shapes.
For all the shape tools I would say the easiest way to quickly create the shape you want.
- Here appears a dialog box when we click on the canvas.
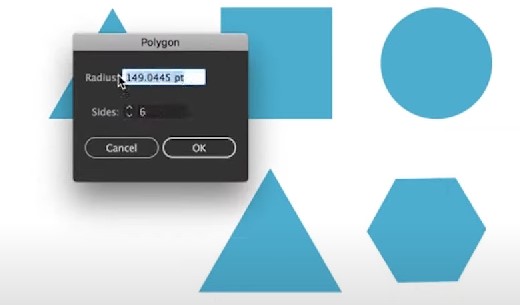
- This will ask you for the radius and the number of sides you want to add to your object.
- Fill it up and you are going to get the required shape.
Pretty cool, if you can utilize all the shape tools really well.
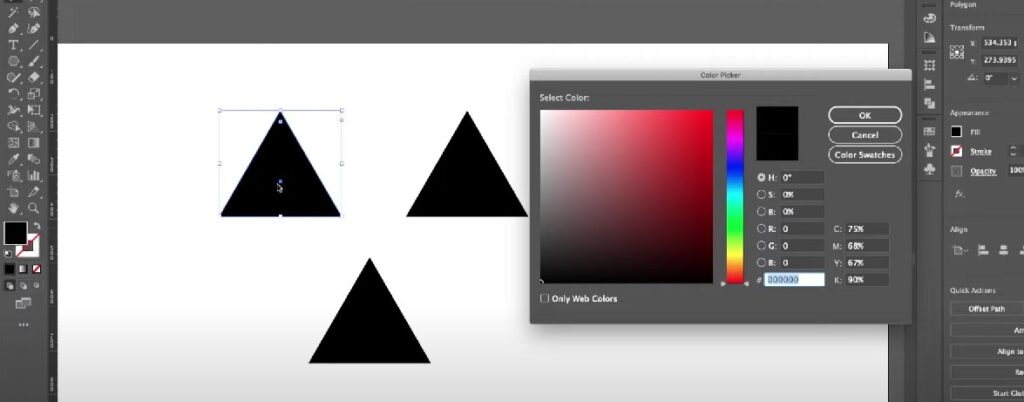
Color picker in Adobe Illustrator
Did you know that there is a super-fast efficient and wonderful color picker hidden in another feature? We’ll going to make straight to the point.
Here we have got just a couple of triangles. If you wanted to add colors to it, have a look below:
- Have a double click on the color swatch below in the tool panel and find the color you would like.
First way, you can add one of these as a swatch that you can reuse in your document without having eyedropper this shape is to open up your swatches panel.
- You can find the panel in the window drop down menu and then swatches.
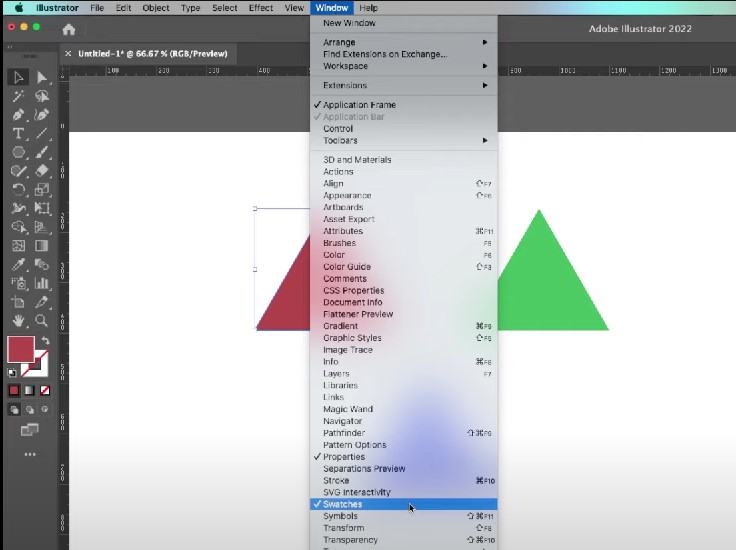
- Swatch panel is open up and you will see a bunch of default things here.
- Click the little plus button (a new swatch button) at the bottom of the swatch panel.

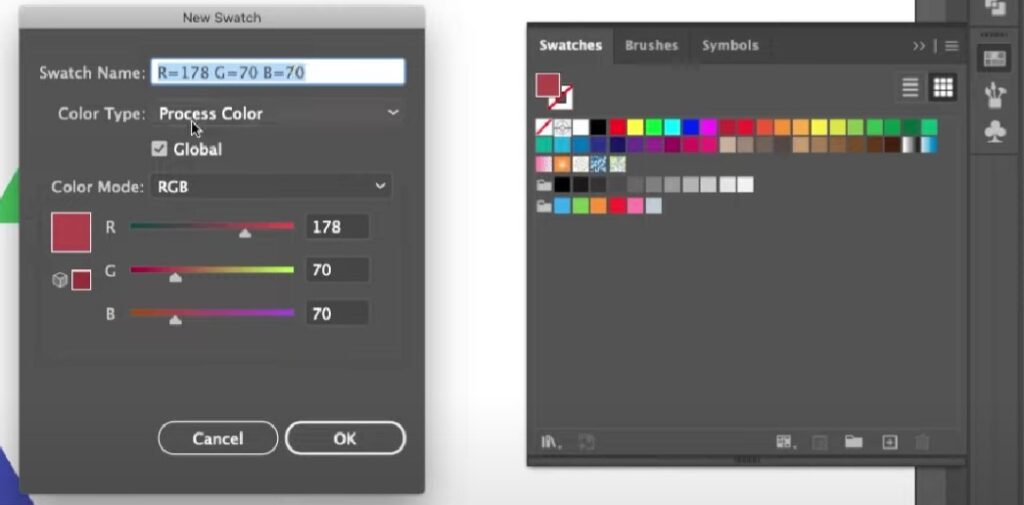
- Here you make changes to color mode to edit it.
- Hit ok, and look it has added the color.
- If you start to go through them selected then obviously when you click the swatch it’s going to apply that color to whatever you have selected.
- So, make sure you don’t have anything selected when you are clicking around on these objects
How to add texts in Adobe Illustrator?
We’re going to be learning how to add and manipulate text in adobe illustrator.
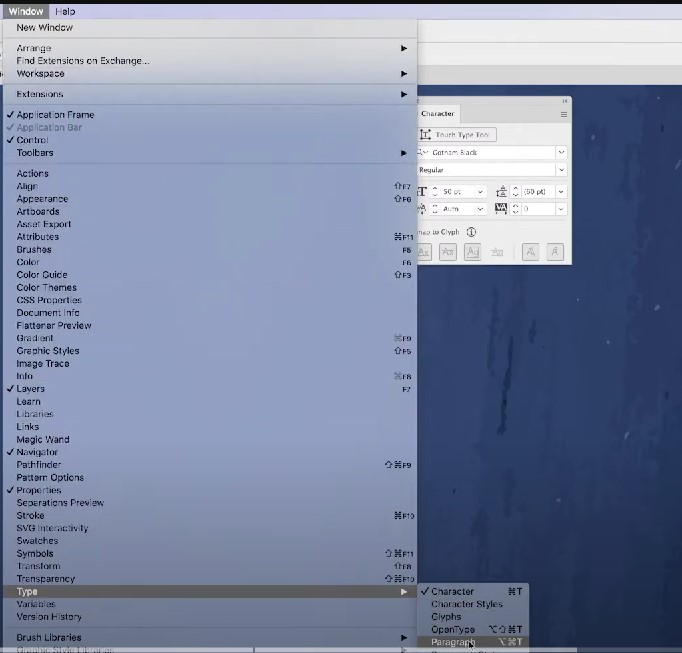
- Before adding text, we’re first going to open the character and paragraph panels from the window menu.
This will allow us to easily control the font size style and alignment.
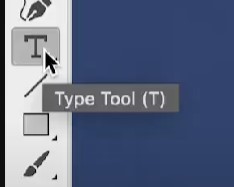
- Click the type tool within the toolbar and then decide what kind of text you wish to add.
- For a single line, simply click somewhere on the document and begin typing.
- For paragraph style click and drag a text box within the document and start typing.
- You can then use the selection tool to resize your text box by dragging its corners.
- You can also reposition your text by dragging the object anywhere on your document.
- Once you’ve entered your text, use the character and paragraph panels to modify your font size, line spacing, kerning and alignment.
- You can select text and use the color picker to change its color.
A quick way to add text that’s already on your computer in a text file such as a txt or Microsoft word file is:
- Go to file menu and click on place.
- Then choose the text document from your computer and click place.
- Make any necessary changes in the options window and then click ok.

- Now click and drag a paragraph text box within the document. Your text will automatically be placed inside the box.
How to place Images in Illustrator.
Illustrator allows you to place objects within your documents and it can support a variety of file formats. You can place rasterized images like JPEGs and PNGs and you can also do vector graphics like other illustrator file even PDFs. First, we need an image, now let’s head over to illustrator and we will show you how to embed this into your document.
- To do this we’ll go into illustrator up to the file and down to place.
- We’re placing an image into our document that’s shift + command or control P. Once we open up that into our dialog box, we’re going to be able to navigate.
- First option to show you here is this little link button down here. Now if you uncheck this, you’re going to have an embedded image into your document. If you check this, you’re going to have a linked image in your document I’m going to leave it uncheck marked. This will place a copy of my image into whatever layer I have selected

- Once It’s placed, we can scale it, rotate it and move it like other objects.
Well, this is almost the complete basic which we need to set into our mind to master Adobe.
Wrapping up
Learning how to use Adobe Illustrator can be a valuable skill for designers, artists, and other professionals in various industries. Through online tutorials, users can gain a better understanding of the software’s tools and capabilities, allowing them to create high-quality designs and graphics for their projects. While Adobe Illustrator may have a learning curve, with dedication and practice, users can create stunning artwork and designs that can stand out in any industry. Ultimately, Adobe Illustrator is a powerful tool that can help bring your creative vision to life.