
Today’s world demands dynamic and responsive web application. When we talk about full stack web development, our obvious thought will be MERN stack. It is an integration of powerful technologies which allow us to build interactive user interfaces and make server-side development easier.
In MERN stack, M stands or MongoDB – A NoSQL database, known for scalability and flexibility. However, when we deal with structured data in MongoDB, we often need a pre-defined structure called schema to ensure consistency. Here, we will see step by step guide to make schema in Mern-Stack.
Before starting, we will walk through, what the MERN stack is, the different technologies involved and how they all work together.
What is MERN stack?
Mern stack is defined as the collection of four powerful technologies that works in collaboration to help you build full-stack web applications.
MERN stands for
M: MongoDB: This is a NOSQL database used to store application data.
E: Express.js:- This is a Framework of node.js that helps in managing server-side logic and APIs.
R: React.js: This is a java script library used for building creative user interface
N: Node.js: This is JavaScript run time environment that allows you to run JavaScript code.
Installation of Node.js:
1. Download Node.js from the official website https://nodejs.org and do complete the set up.
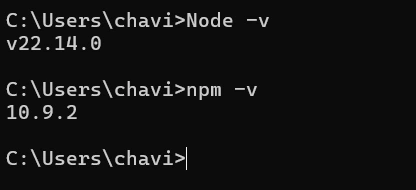
2. After the installation, open the command prompt and run the following commands to check the installation of node.js and its version.
i. node -v: If you have successfully installed node.js, “node -v” command will show you the version of node.js installed.
ii. npm -v: npm -v will help you install all the important libraries.
Create A New Project and Initialize It
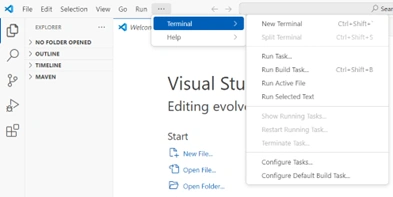
1. Open the terminal in VS code and run the following commands in the terminal.
i. mkdir my-project

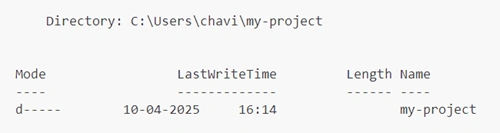
ii. cd my-project

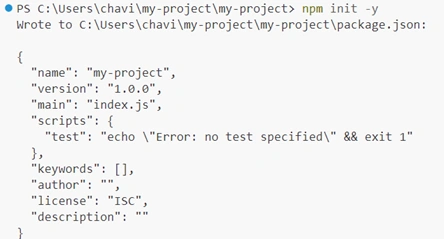
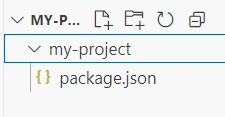
iii. npm init -y: This will create package.json file in your project folder. It will hold all your project settings and dependencies.
Install Required Packages
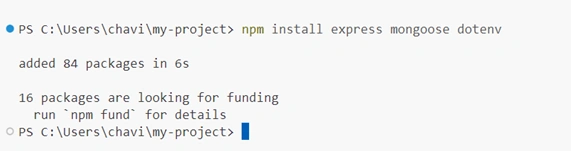
- Using command “npm install express mongoose dotenv”, we will install:
- Express framework to create the server and handle different routes
- Mongoose to connect and interact with database
- Dotenv to load the environment variables from .env file
Setup folder name:
This will organise our different files in different folders to make our code clean and manageable.
- To make folder, we need to enter the command below:
- mkdir model: This will create the folder named model.
Creating server.js file
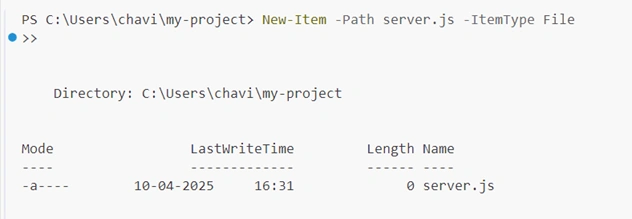
- Enter “New-Item -Path server.js -ItemType File” to create server.js file.
MongoDB Set up
- Install MongoDB on your system from the official website(https://www.mongodb.com/try/download/community) and this will store our project data.
- After installation, run ‘mongod’ in command prompt to check the installation.
Creating .env File
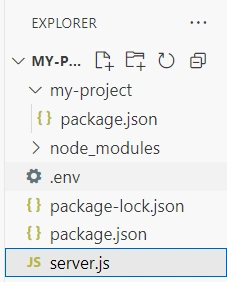
- To create .env file, enter command “ New-Item -Path .env -ItemType File”
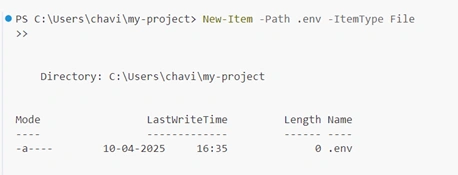
- Your .env file should look like this and save the file.
- Paste the code below in .env file.
PORT=5000
MONGO_URI=mongodb://localhost:27017/mydb- .env file should line in your root folder.

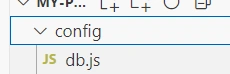
Create DB Connection File (config/db.js)
1. Make a folder name config and create a db.js file inside the config folder.
2. Do follow these steps to do the same.
i. mkdir config
ii. cd config
iii. New-Item db.js
3. Your db.js file should contain the below code:
const mongoose = require('mongoose');
require('dotenv').config()
const connectDB = async () => {
  try {
    await mongoose.connect(process.env.MONGO_URI, {
      useNewUrlParser: true,
      useUnifiedTopology: true,
    });
    console.log(" MongoDB Connected");
  } catch (error) {
    console.error("MongoDB connection failed:", error.message);
    process.exit(1); // Exit with failure
  }
};
module.exports = connectDB;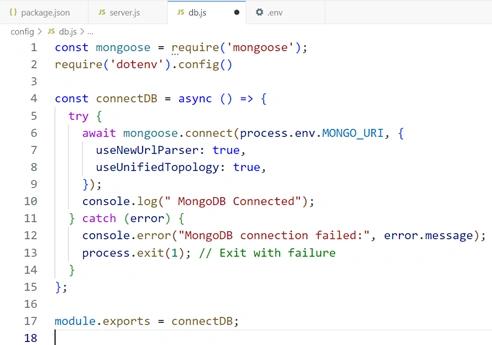
4. Save the file.
5. This will connect your node.js with MongoDB using mongoose.
Use It in Your Server.js File
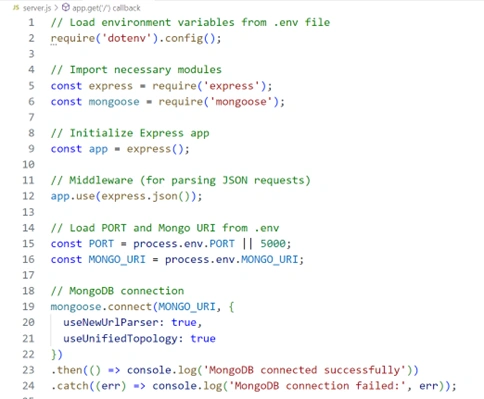
1. In server.js file, which we have created earlier, we have to write this code:
// Load environment variables from .env file
require('dotenv').config();
// Import necessary modules
const express = require('express');
const mongoose = require('mongoose');
// Initialize Express app
const app = express();
// Middleware (for parsing JSON requests)
app.use(express.json());
// Load PORT and Mongo URI from .env
const PORT = process.env.PORT || 5000;
const MONGO_URI = process.env.MONGO_URI;
// MongoDB connection
mongoose.connect(MONGO_URI, {
useNewUrlParser: true,
useUnifiedTopology: true
})
.then(() => console.log('MongoDB connected successfully'))
.catch((err) => console.log('MongoDB connection failed:', err));
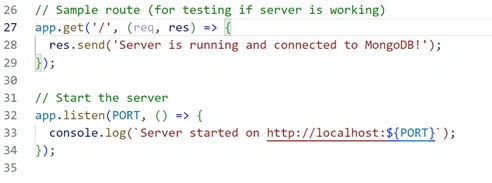
// Sample route (for testing if server is working)
app.get('/', (req, res) => {
res.send('Server is running and connected to MongoDB!');
});
// Start the server
app.listen(PORT, () => {
console.log(`Server started on http://localhost:${PORT}`);
});
2. Save all the files we have created till now.
3. Open the terminal and run node server.js to check MongoDB connectivity.
4. If you have followed all the steps very well, this will show you a message “MongoDb connected successfully.”

After setting all this up, we will now see how we can create database schema inside MongoDB database.
To successfully perform the CRUD operation, we need to the MVC pattern. MVC stands for “Model, View, Controller” pattern. The ‘Model View Controller’ pattern or framework is an architectural pattern that separates the application into three main logical components. All these three logical components are connected together and manage your data efficiently.
Creating MVC pattern application in the express.js
Creating The Model
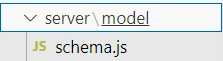
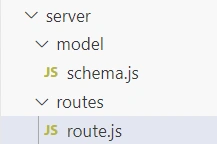
- Under your project, Inside the server file, Create a new folder and name it as model.
- Inside this model folder, create a new file named schema.js.
What is schema?
In MongoDB, we have a concept called schema. Schema is defined as structure or blueprint of MongoDB document. With the help of schema, we can define the specific structure of our MongoDB collection.
For example: If want to create two objects i.e. “title and content”, and we want to have some values inside it. This can be done using MongoDB schema. You can inform MongoDB to use this particular structure to create a database document.
Creating A Schema in MongoDB Document
1. We have already created a separate file to create a model, because we need to following the separation of concern principle of programming.
i. Inside the schema.js file, firstly we require mongoose model.
Const mongoose = require(“mongoose”)MongoDB alone is schema-less. Because, it is mongoose that allows us to create models and schemas for our data in the database.
ii. To create a new schema, we’ll firstly write:
const Schema = mongoose. Schemawe will use this function to create a new schema and in next step invoke the same.
iii. const schema = mongoose.Schema({
});
This creates a new schema for us. We will pass an object as an argument in this function, where we define this schema. This will show, how does our data look like.
Describing the database structure
1. Our schema should have a ‘title’ property.
i. To add a title property to the schema, we will follow the below syntax.
title: {
type: String,
unique: false,
required: true
}
ii. This “Title” will be an object, where we define bits of information about what should it holds.
For example:
- We can add a “type” here to describe that it should be a string. If we try to save a new document to the database, where the title isn’t a string, it will not allow us to do that.
- We can also apply some constraint inside it such as using a required property and setting it true.
- Another constrain that can be added is unique. This will make sure that, the title entered by user should be unique. It will not allow us to enter duplicate values.
2. To add ‘description’ as another property we will write:
Description:{
Type: string
Unique: false
Required: false
}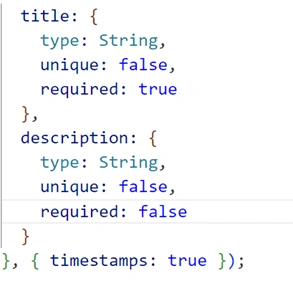
- This time, we will set ‘required’ and ‘unique’ property as false, because these are not mandatory to be filled in case description.
- We will Add more properties to this schema in the same way.
- To add more properties to schema, you can add more specification by following the same steps as we did above.
How timestamps work?
After following all this, we will pass the second argument to this schema.
i. The first argument describes how the document looks like.
ii. Second argument is a timestamps property which we will set true.
{ timestamps: true }iii. When we try to create a new document, it automatically adds two properties that is a ‘CreatedAt’ and ‘UpdatedAt’. This keeps track of when the document was created and when it was last updated.
Creating the Model from Schema
1. Now, we need to do is store this document in a collection. As we know, collection contains multiple documents inside the JavaScript file.
2. We will call mongoose module -> mongoose and then call a method called ‘model’.
3. Inside the ‘model’ method, we will pass the name of our collection and then pass the saved document(schema) as arguments.
mongoose.model('MyCollection', TodoSchema).4. Here, we have given the name of collection as ‘MyCollection’. You can use your collection name according to your choice.
5. We have stored the schema in a variable names TodoSchema.
const TodoSchema = new Schema({
title: {
type: String,
unique: false,
required: true
},
description: {
type: String,
unique: false,
required: false
}
}, { timestamps: true });
Exporting the Model
- We will Export the object [mongoose.model(‘MyCollection’, TodoSchema)] using module.export method.
module.exports = mongoose.model('MyCollection', TodoSchema)Note*
- The schema defines the structure and type of a particular document inside our database.
- Model takes the schema and apply it to a MongoDb collection.
Final Code
const mongoose = require('mongoose')
const Schema = mongoose.Schema

const TodoSchema = new Schema({
  title: {
    type: String,
    unique: false,
    required: true
  },
  description: {
    type: String,
    unique: false,
    required: false
  }
}, { timestamps: true });
module.exports = mongoose.model('MyCollection', TodoSchema);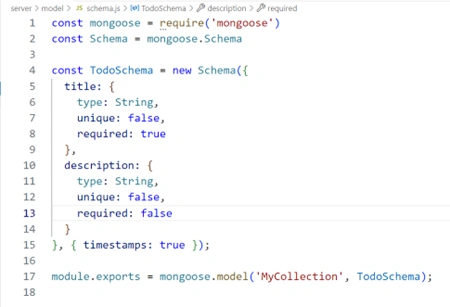
We have successfully created the module of MVC pattern.
Now, once we understand how to create a model inside the express application, let us also create different routes for the controller.
Creating Routes
1. Inside the Server folder, we will create a new folder “routes”
2. Inside the routes folder, create a new file and specify it as routes.js.
3. We will define a function in this file, and inside the parenthesis, we will pass the app parameter.
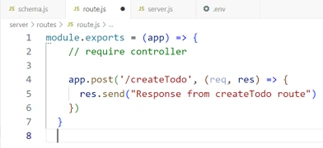
4. Write the following code in route.js file:
module.exports = (app) => {
  // require controller

  app.post('/createTodo', (req, res) => {
    res.send("Response from createTodo route")
  })
}
i. Inside this function, we will create different routes using app object.
ii. We will Export this function using ‘module.exports’ and now this can also use this function in other files.
iii. We will call HTTP method ‘post’ using ‘app’ instance.
iv. When we call this function inside the server.js, we will pass Express app instance in this parenthesis.
v. Using ‘app’, we can access different HTTP methods inside this function.
vi. Inside the post method, we will define our route and pass a ‘call-back’ function.
vii. In the ‘call-back’ function, we will send the response to that particular route.
viii. We will call the route function in server.js file.
require(‘./routes/route’)(app);
ix. Save the file.
x. This is how we have successfully created a simple API inside the express application.
xi. You can test this API by using Postman testing tool.
Here, we have been through each and every step of setting up a MERN stack project, which particularly focuses on how to create a database schema using Mongoose. If you have any further query and want to know more in detail, you can also take up online/offline Mern -Stack Development course and dedicated Mern Stack Development training in Delhi from our institute.