Video Editing Course Institute In Dwarka
Video Editing Course Near you
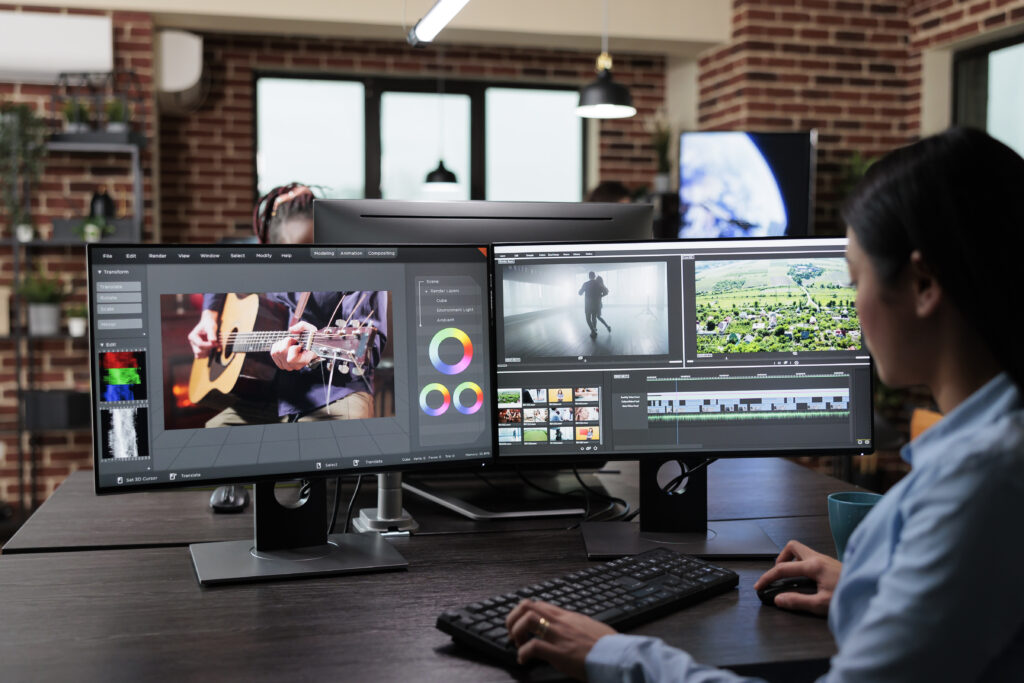
Are you ready to embark on an exciting journey into the world of video editing? This detailed course is meant to provide you with the skills and knowledge necessary to create beautiful videos and effects that will draw audience’s attention.
Book You Demo Class
6-Months Course Duration
100+ Learners Trained
Guaranteed Placement
Guaranteed Certification
Course Curriculum
ADOBE PHOTOSHOP
- Menu bar, application bar, options bar, tools panel, panel dock on right
- Differences on PC and Mac
- Different ways to zoom
- Hidden tools on toolbar
- Why make selections
- Geometric selections
- Freehand selections
- Edge-based selections
- Color-based selections
- How do I choose a selection tool?
- Making color and tonal adjustments
- Creating an adjustment layer
- Adjustment presets,
- Common image corrections
- Saving adjustments as a preset
- Deleting adjustment layer
- Applying adjustment layer to another layer
- Blur tool
- Sharpen Tool
- Smudge Tool
- Dodge Tool
- Burn Tool
- Sponge Tool
- Image menu
- Color mode
- Image resolution and size
- Straighten and crop image
- Rotate cropped image
- Automatic adjustments
- Auto color—removes color cast
- Manually adjusting color cast
- Manually adjusting tonal range
- Replacing color
- Clone tool
- Spot healing brush
- Healing brush
- Patch tool
- Background layer
- Isolating part of image
- Hide, view, reposition, delete, rename, merge
- Lock layers
- Convert background layer to regular layer
- Convert regular layer to background layer
- Layer styles
- Applying layer styles to multiple layers
- Gradient tool
- Gradient styles
- Editing colors
- Saving gradients
- How is it different than selection tools?
- Save time-consuming selections
- Quick mask mode
- Using brush tool
- Channels panel
- Loading mask as a selection
- Unprocessed picture data
- More control over:
- White Balance
- Tonal Range
- Contrast
- Color Saturation
- Set up camera to save as camera raw
- Nikon (.nef)
- Canon (.crw)
- Olympus (.orf)
- Opening up other file formats in RAW
- Using Bridge vs. Photoshop
- White balance
- Adjust for different lighting settings
- Save as DNG file, open source file
- Exposure
- Fill light
- Sharpening an image
- Synchronize across images
ADOBE ILLUSTRATOR
- Control panel
- Working with panels
- Tool panel
- Saving your work
- Using multiple artboards
- Customizing your workspace
- Selection Tool
- Direct Selection Tool
- Magic Wand
- Grouping objects
- Aligning objects
- Basic Shape Tools
- Stroke and Fill
- Line segments
- Joining paths
- Modifying basic shapes
- Shape Modes v. Pathfinders
- Shape builder (NEW TO CS5!)
- Scaling objects
- Reflecting objects
- Distorting objects
- Shearing objects
- Making multiple transformations
- Creating straight lines
- Creating curved paths
- Curves and corner anchor points
- Selecting and manipulating curves
- Pencil tool
- Changing pencil tool options
- Smooth tool
- Variable-width strokes (NEW TO CS5!)
- Drawing tablet
- CMYK v. RGB
- Color panel
- Color guide
- Appearance panel
- Creating and saving custom colors
- Swatch libraries
- Spot colors
- Live paint
- Kuler color panel
- Importing text files
- Using columns
- Threading Text
- Character Panel
- Character Styles
- Paragraph Panel
- Type on a path
- Outlining type
- Creating layers
- Moving layers
- Locking layers
- Viewing layers
- Merging layers
- Isolation mode
- Linear vs. Radial Gradients
- Using the Gradient Panel
- Changing colors of gradient
- Changing direction of gradient
- Transparency and gradients
- Gradient Tool
- Blending objects
- Specified Steps vs. Smooth Color
- Modifying blends
- Symbol libraries
- Creating symbols
- Editing symbols
- Applying a symbols instance
- Breaking link to symbol
- Symbol sprayer tool
- Brush libraries
- Creating own brushes
- Pattern brushes
- Bristle Brush (NEW TO CS5!)
- 3D effects
- Modifying 3D object
- Mapping artwork to 3D object
- Perspective grid (NEW TO CS5!)
ADOBE AFTER EFFECTS
- Understanding the Workspace
- Creating a Composition
- Importing Media
- Organizing the Project panel
- What is a Timeline
- Working with Layers in a Composition (Timeline)
- Transform Properties: Position, Scale, & Rotation
- Working with Audio in the Timeline
- Animating Transform Properties such as Position
- Adding Easing
- Swapping Out Layer Content While Keeping Keyframes
- Adding a Text Layer to the Timeline
- Adding Layer Styles: Drop Shadow & Stroke
- Adding Video to a Composition
- Changing Video Speed: Slowing Down Video (Slowmo)
- Animating Multiple Layers Simultaneously with Parenting
- Animating Opacity
- Adding Audio & Video Fades
- Changing Work Area & Composition Duration
- Copying & Pasting Keyframes
- Creating a Vignette Effect with a Mask
- Using Adobe Media Encoder
- Exporting Files
- Media Encoder vs. Render Queue
- Organizing the Timeline: Color Labels & Shy Layers
- Animating Transform Properties: Scale, Position, & Opacity
- Animating Multiple Layers Together
- Creating Staggered & Sequential Animations
- Exporting Transparent Video
- Working with Adobe Illustrator Files
- Converting Illustrator Layers into Native Shape Layers
- Working with Shape Layer Effects
- Understanding Masks
- Adding Masks to Layers
- Using Track Mattes
- Adding Effects to Layers
- Understanding Native Text Layers
- Creating & Editing After Effects Text
- Animating with Text Animators
- Creating More Complex Animations with Precomps
- Combining Nested Compositions
- Adding Audio
- Adding Motion Blur
- Animating With the Linear Wipe Effect
- Applying Multiple Text Animators
- Saving Text Animation Presets
- Using Masks to Control Effects
- Working with Effects
- Manually Staggering Layers
- Creating Curved Motion Paths
- Looping an Animation with Expressions
- Working with Essential Properties
- Adding Motion Blur to a Nested Compositions
- Point Tracking
- Motion Tracking
- Null Object Layers
- Working with Multiple Trackers
- Importing After Effects Comps
- Creating Curved Motion Paths
- Looping an Animation with Expressions
- Working with Essential Properties
- Adding Motion Blur to a Nested Compositions
- Working with Greenscreen Video
- Using the Keylight Effect
- Video Compositing
ADOBE PREMIERE PRO
- Starting a New Sequence & Understanding Sequences
- Understanding the Timeline
- Adding Clips to the Timeline
- Editing Tools – Razor Cuts , Ripple Edits , Slips
- Syncing Audio and Video with the Click of a Button
- Video Properties – Scale , Position , Opacity
- Types of Cuts – Straight ,J-Cut,L-Cut
- Create a Zoom In/Zoom Out Effect with Keyframes
- Use Nests to Create a Cool Zoom Sequence
- Using Blend Modes to Combine Videos
- Create a Circle Video Mask
- Create a Split Create Effect with Border
- Adding Video Transitions
- Customizing Video Transition Properties
- Adding Audio Transitions and Create Custom Audio Fades
- Create Custom Transitions with Adjustment Layers
- How to Make Your Audio Louder or Quieter (Adjusting Audio Levels)
- How to Remove Background Noise from Audio in Premiere Pro
- The Essential Sound Panel Tutorial: Editing Audio Easily in Premiere Pro
- Adjusting Music Levels with Talking Audio (Ducking Tutorial)
- Make Music Tracks Longer or Shorter to Match Video Length
- Use the Track Mixer to Adjust and Add Effects to Entire Tracks
- How to Create an Audio Preset in the Essential Sound Panel
- Adding and Adjusting Sound Effects | Premiere Pro Video Editing Course
- Adding Sound Effects to Improve Your Videos
- Create Titles and Graphics in Premiere Pro using the Essential Graphics Panel
- Using Adobe Media Encoder
- Exporting Files
- Media Encoder vs. Render Queue
- Introduction to Color Correction and Color Grading
- Fixing While Balance , Exposure , Saturation with the Lumetri Color Basic Tab
- Monitor Calibration and Color Correction
- Adding Style with the Lumetri Color Creative Tab
- Reading Waveform Scopes to Help with Color Correction
- Editing Exposure and Specific Saturations with the Lumetri Curve Tab
- Match Color B/w Shots with the Lumetri Color HSL Secondary Tab
- Adding Vignette with the Lumetri Color Vignette Tab
- Changing Colors in Video
- Sharpen Faces with the Lumetri Control Panel
- Understanding Native Text Layers
- Creating & Editing After Effects Text
- Animating with Text Animators
- Working with Greenscreen Video
- Using the Keylight Effect
- Video Compositing
- Introduction to Color Correction and Color Grading
- Fixing While Balance , Exposure , Saturation with the Lumetri Color Basic Tab
- Monitor Calibration and Color Correction
- Adding Style with the Lumetri Color Creative Tab
- Reading Waveform Scopes to Help with Color Correction
- Editing Exposure and Specific Saturations with the Lumetri Curve Tab
- Match Color B/w Shots with the Lumetri Color HSL Secondary Tab
- Adding Vignette with the Lumetri Color Vignette Tab
- Changing Colors in Video
- Sharpen Faces with the Lumetri Control Panel
- How to Add and Adjust Effects to Your Video | Premiere Pro Video Editing Course
- How to Animate On/Off Video Effects | Premiere Pro Video Editing Course
- How to Stabilize Shaky Camera Footage | Premiere Pro Video Editing Course
- How to Blur Out Faces and Other Objects in Your Videos
- Video Speed
- Remove Green Screen Backgrounds in Premiere Pro
- Improve Green Screen Footage and Match Your Backgrounds Better
- Marking and labelling Shots
- Quickly Swap Media with the Option Drag Trick
- Working with Different Video Resolutions and Speeding Up This Workflow
- Export a Still Image From Video
- AutoFrame
- Relinking Missing Footage
- Linking , Unlinking and Grouping Clips

Whether you’re a beginner or have some experience with video editing. This course will take you to very advanced techniques which will allow you to bring your creative vision to life.
The process of altering and arranging video footage, audio, and other elements to create a finished video product is commonly referred to as video editing. It includes tasks like clipping and trimming, adding graphics, transitions, adjusting color and lighting, syncing audio, and more. It is being an important step in the creation of various types of contents.
Tools and Technologies covered

Photoshop

Adobe Illustrator

After Effects

Premiere Pro
Get Certified and Grow your career
We are delighted to provide you with an exceptional opportunity to improve your skills and expertise by completing our comprehensive certification course. After completing the course successfully, you will be going to receive a recognized certification and also will be having the confidence and proficiency to deal with real-world challenges.

This course will teach you the following skills
- Develop narrative skills to engage and draw in your audience.
- Be aware of the differences between formats, resolutions, and aspect ratios.
- Study advanced editing techniques for smooth transitions and narrative storytelling.
- Discover how to select and sync music that complements your video.
Job Opportunities
- Freelance Video Editor
- Motion Graphics Designer
- Colorist
- Assistant Editor
- Content Creator/You Tuber
- Film or TV Production Assistant
- Commercial and Advertisement Editor
- Documentary Editor
Course for
Fresher | Students | Anyone who wants to up skill themselves.
Minimum Eligibility
Anyone who has completed their academic and undergraduate education is eligible to enroll in the course.
Enroll Now Video Editing Course

Frequently Asked Questions
Look at the most common frequently asked questions of students in 2023-24
It is imperative that before learning the MERN stack, one has a basic understanding of web development. You must therefore have knowledge of HTML5, CSS3, and JavaScript before you can begin learning MERN Stack. Gaining these skill sets will help you learn MERN Stack more quickly as you work your way through its complexities. But if you are a beginner, it won’t be a big issue to get all these things. Your basics will be all cleared with in the course itself.
MERN Stack outperforms rival Stacks in Ul rendering and performance, is still fully open-source, and only requires JavaScript as its programming language. The JavaScript library/framework used by MERN Stack is React.js, as opposed to Angular.js, which is the only distinction between it and MEAN Stack. Therefore, the differences in Ul rendering and performance are found in the framework and library. Although the Angular.js framework and the React.js library are more recent, there are advantages and disadvantages to both. Additionally, Angular.js has a steeper learning curve than React.js, according to some programmers.
MERN Stack is a highly sought-after skill because creating modern web pages and applications is critical for almost every business, large or small. The technologies in this stack are the current industry leaders for dynamic and responsive JavaScript programming. If you’ve worked with other web stacks, learning MERN could be just what you need to advance your career. MERN is a great option if you’re learning web stacks for the first time because of its wide range of applications. MERN Stack developers frequently benefit from high beginning pay, remote work options, and chances for continued professional growth.
